Making homemade dog toys is a great DIY craft project for humans, and a fantastic and sustainable way to provide your dog with enrichment and fun.
Here at Battersea, our staff and volunteers get creative making toys and enrichment puzzles for all our animals and we’ve asked them to show you how to make them for your own dog. You can watch our helpful videos or follow the step by step guides below.
DIY DOG SNUFFLE MAT
A snuffle mat is a great enrichment game for your dog. It makes mealtime more of a puzzle and a little more interesting and it can also help slow down your dog’s eating, as they have to hunt for the food in the folds of the mat.
You should always monitor your dog when they are eating from a snuffle mat to make sure they don’t tear off any bits of material and ingest them
Read the steps
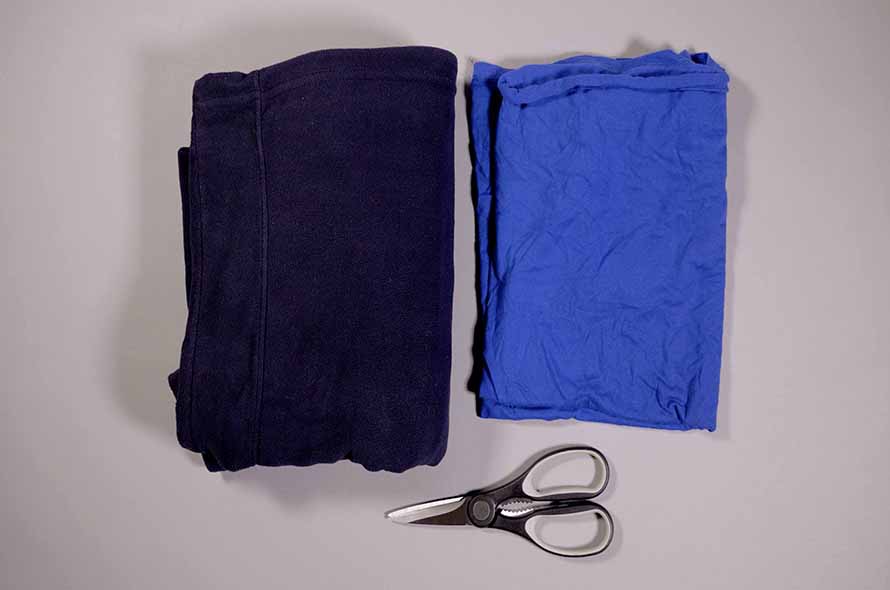
- An Old T-shirt and/or jumper (A jumper or polo shirt is best as some t-shirts can be a little too stretchy)
- A pair of Scissors
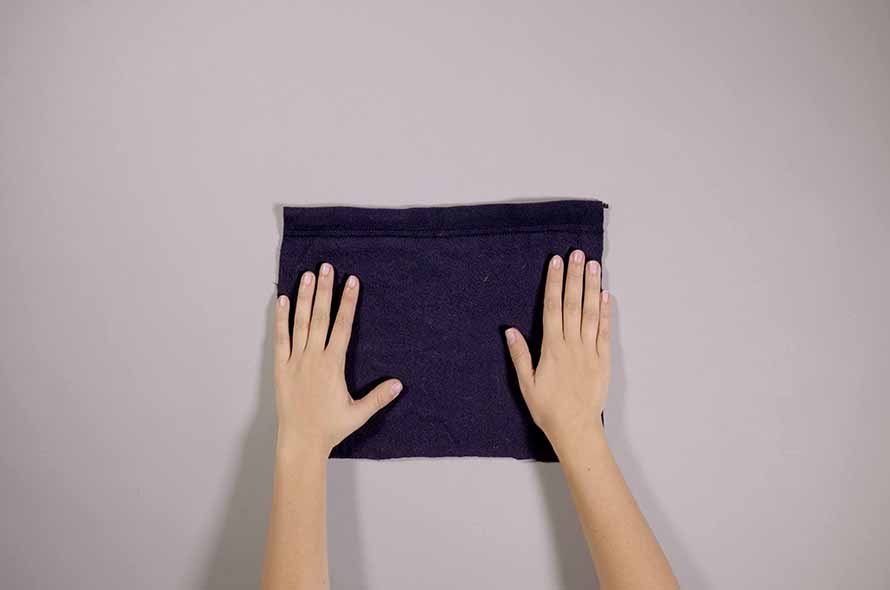
STEP 1
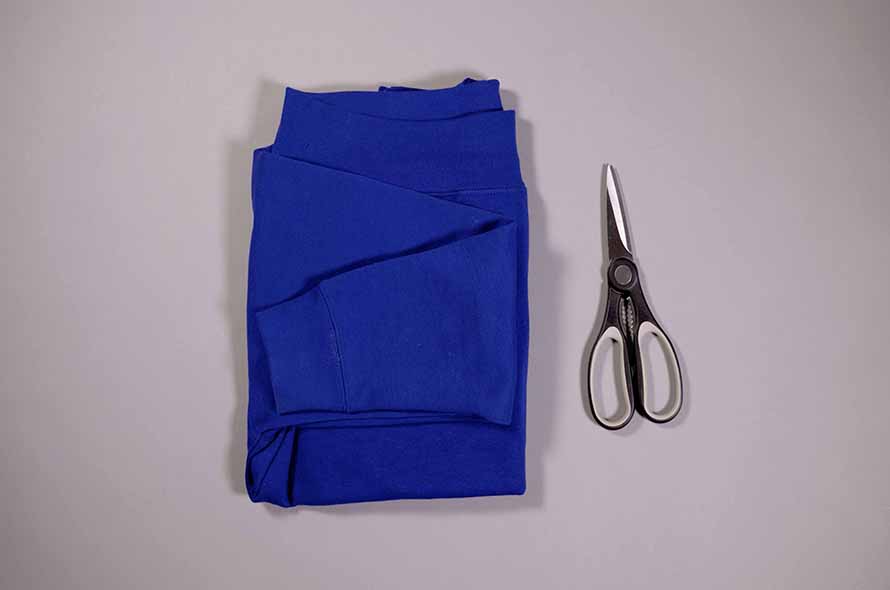
First, cut a large rectangle from your t-shirt or jumper. This will form the base of your snuffle mat. If you have both a thicker jumper material and a t-shirt, it’s best to use the thicker material for the base. You can make your snuffle mat any size you like, but around 25 cm by 35 cm is a good size to start with.
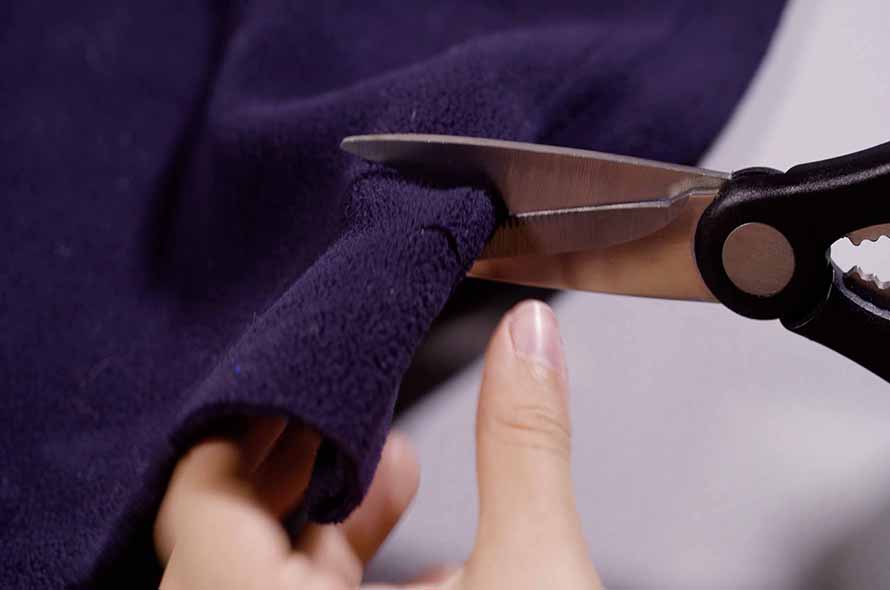
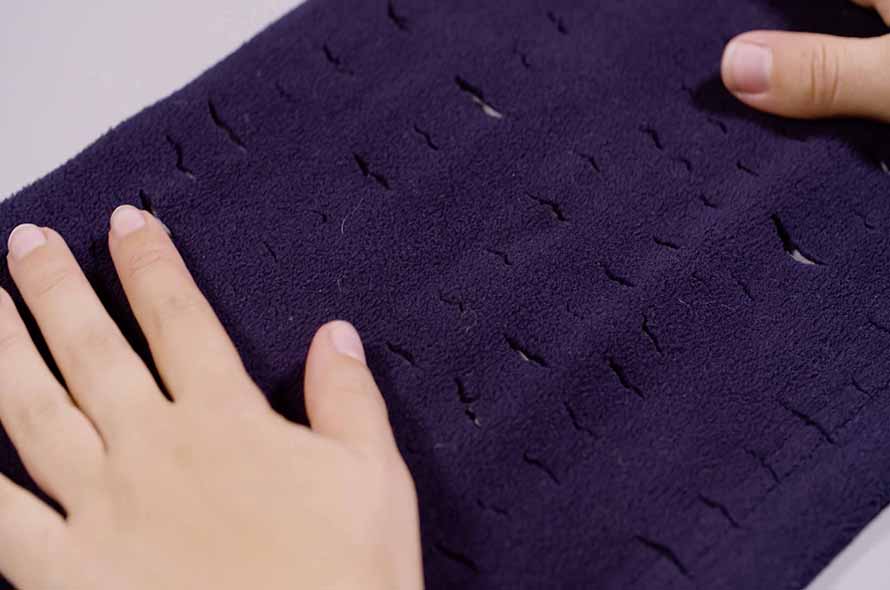
STEP 2
Next, snip a row of small holes along the length of the material, leaving about 1 cm between each hole. Repeat this step until you have around 8 rows of holes, leaving a few centimetres of space between each row.
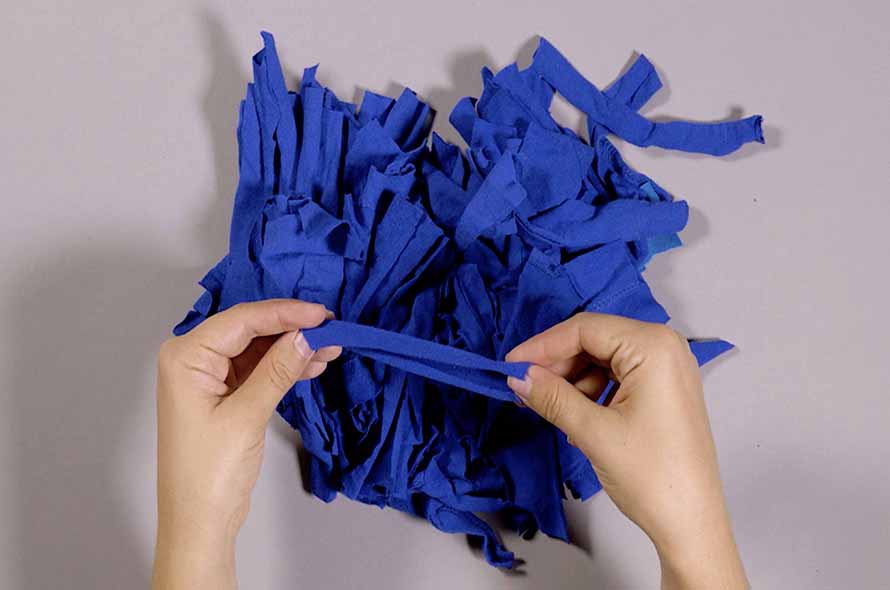
STEP 3
Now you need to cut lots of strips of material to tie onto your mat. The strips should be about 20 – 25 cm in length, and about 3-4 cm wide. Get creative with your colours!
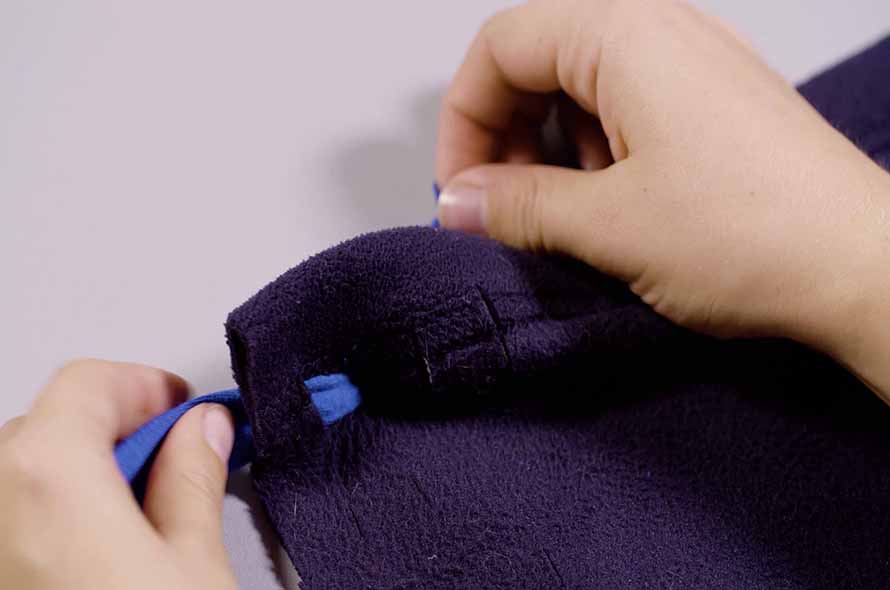
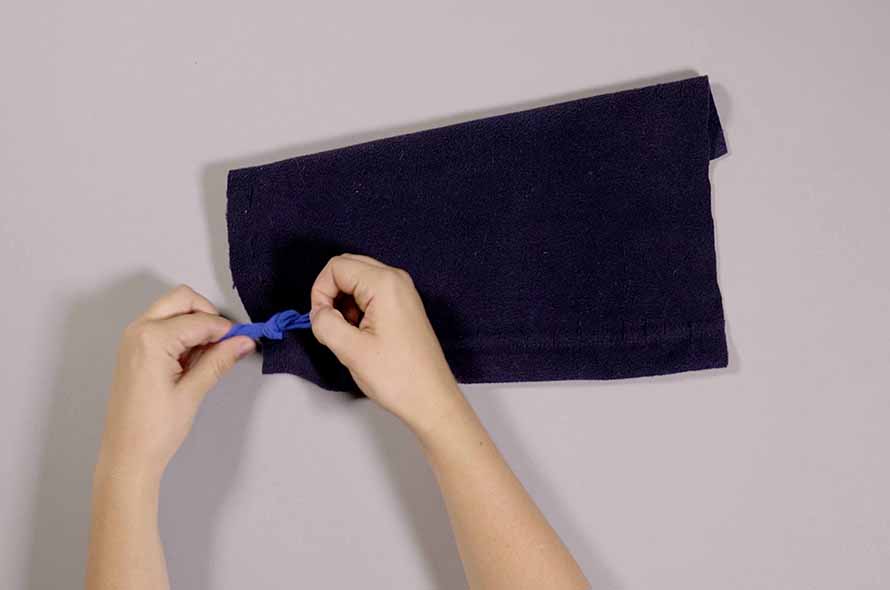
STEP 4
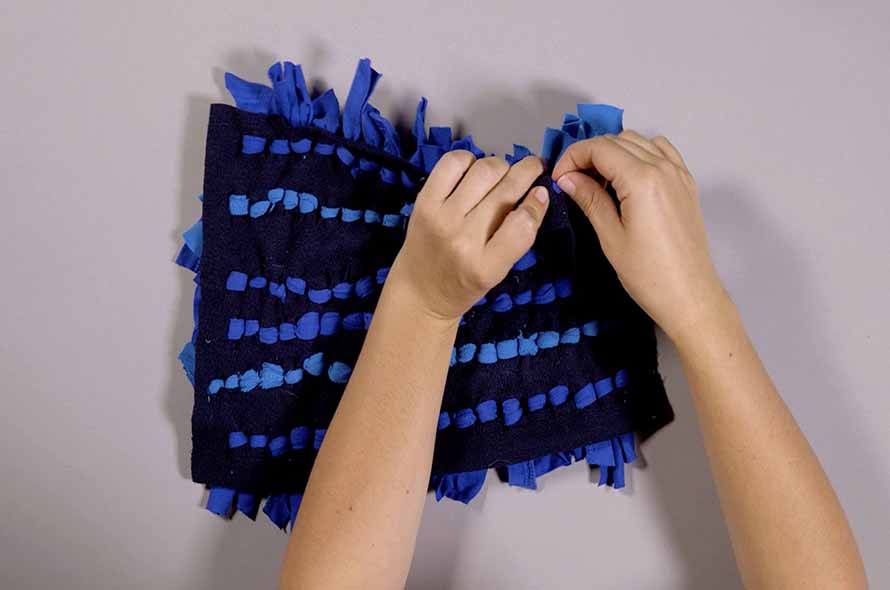
When those are done, decide which side of your base you want to face upwards. Once you’ve decided, take a strip of material, and thread it through the back of the first and second hole of the first row. Flip the mat over and tie the strip into a double knot around the front. Repeat this until all of the holes are filled.
STEP 5
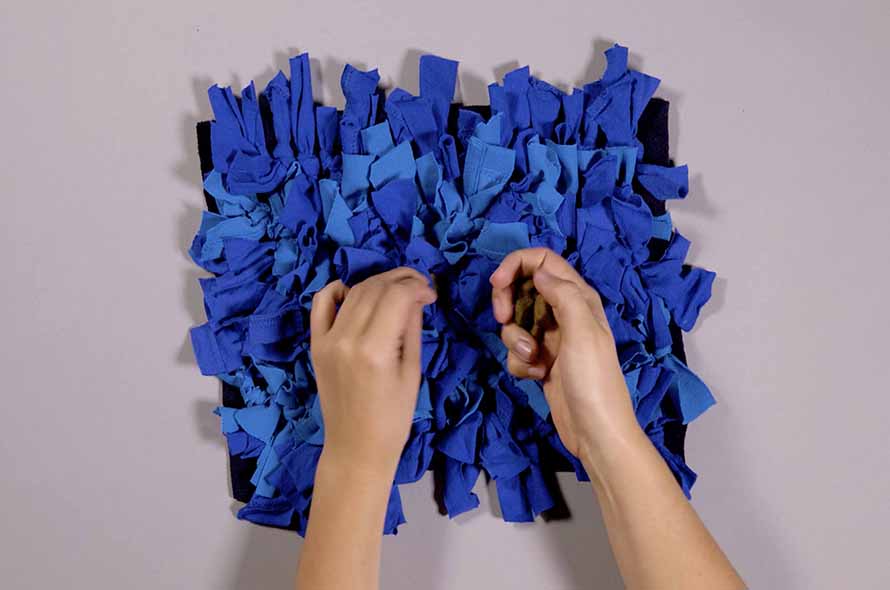
Your DIY snuffle mat is ready! When you’re ready to feed your dog, simply hide a portion of their daily food allowance in the folds of the mat and then place it on the floor for them to investigate. It’s best to stick to dry food as wet food could get messy!
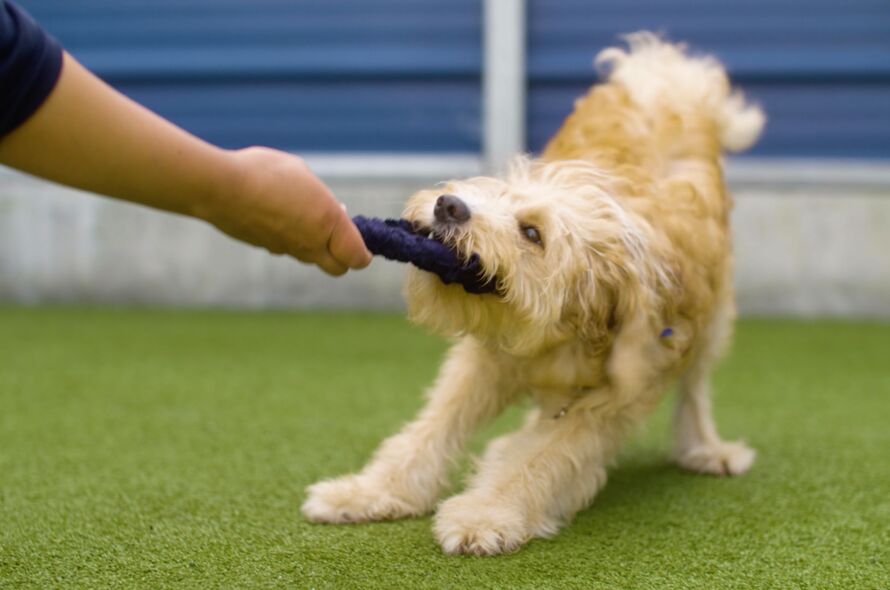
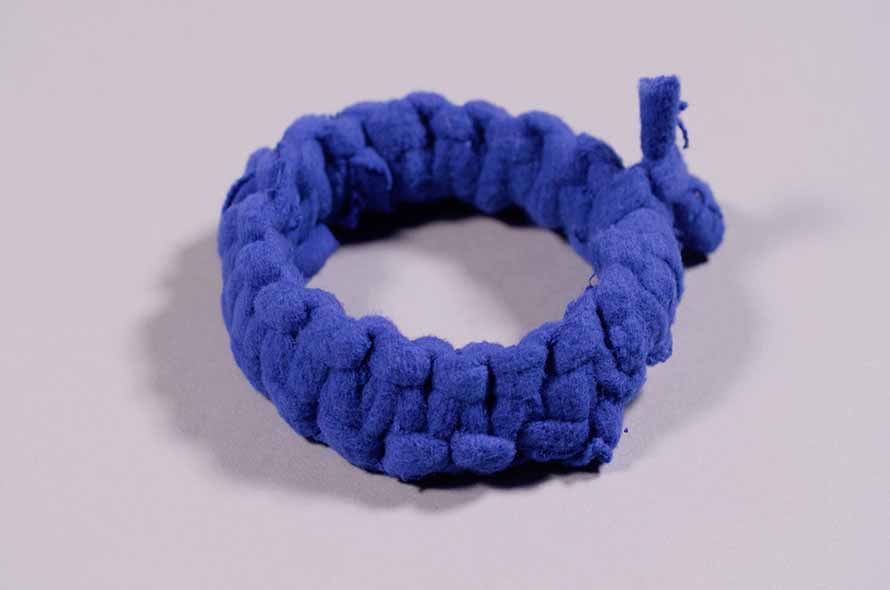
HOMEMADE RING RAGGER DOG TOY
A homemade ring ragger toy is great for a tug game with your adult dog or puppy. They can be especially good toys for young puppies with sensitive gums, just don’t tug too hard. It’s a good idea to have two toys to hand when playing in order to encourage constructive play and stop your dog being too possessive over one particular toy.
You should always monitor your dog when they are playing with their DIY ring ragger toy to make sure they don’t tear off any bits of material and ingest them.
Read the steps
- A pair of scissors.
- An old jumper - we recycle old Battersea uniforms to cut down on waste.
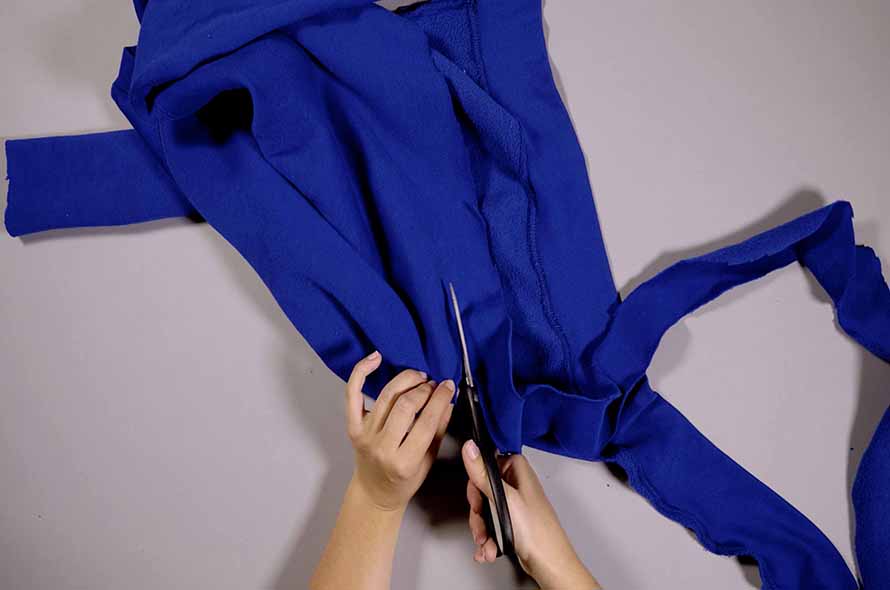
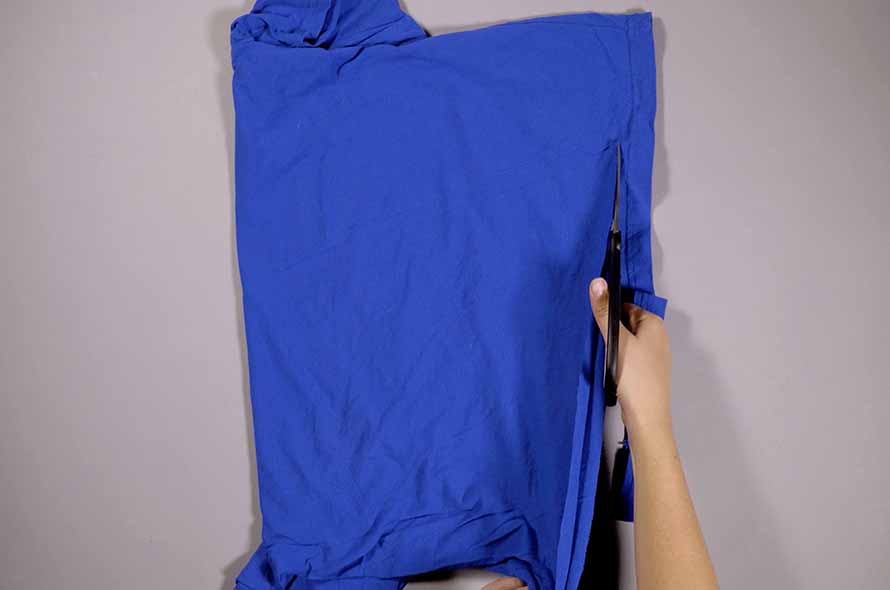
STEP 1
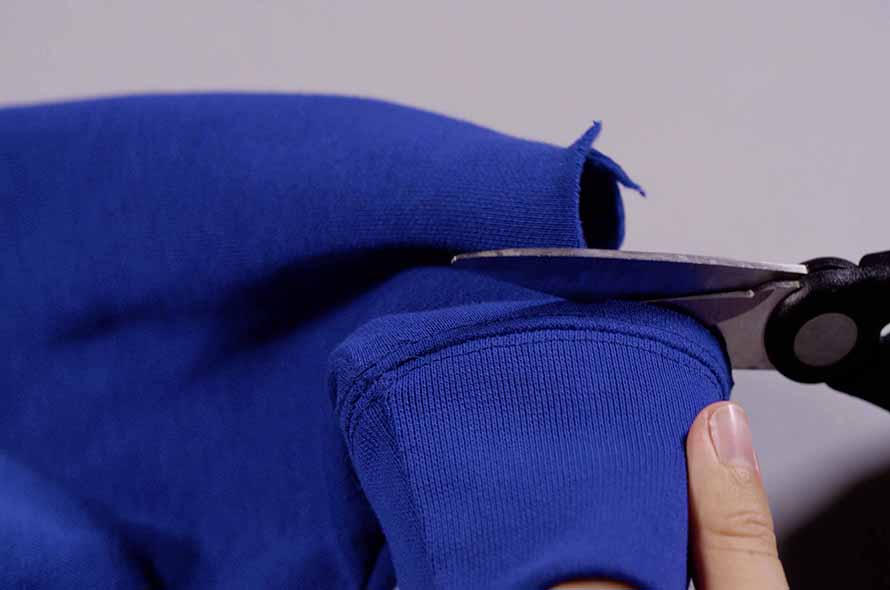
Start by cutting the cuff off the jumper. This will form the base of the toy. If you have a bigger dog, you can make the ring ragger bigger by using the neck or bottom of the jumper, instead of the sleeve cuff.
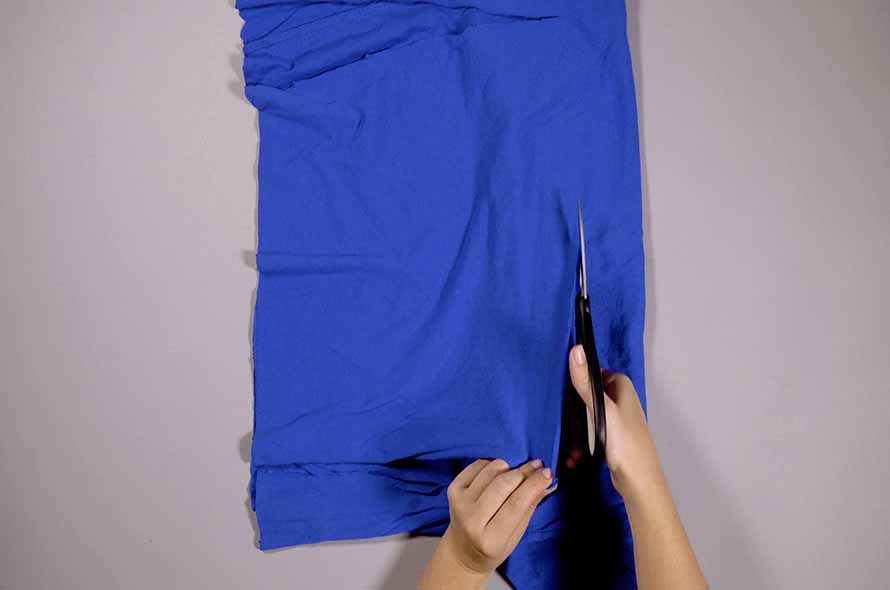
STEP 2
Next, cut one long strip of material from the rest of the jumper. Make this piece as long as you can to make sure it will go all the way around your jumper cuff.
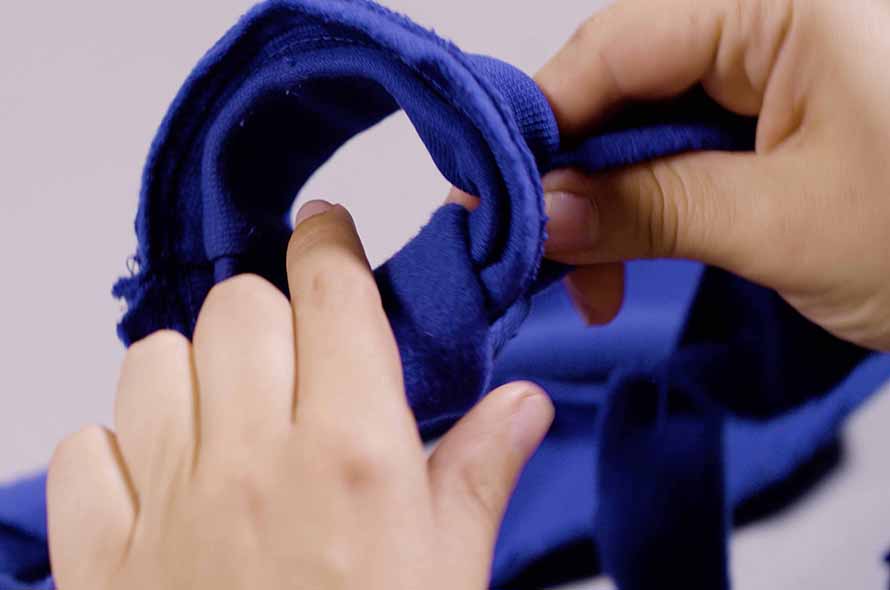
STEP 3
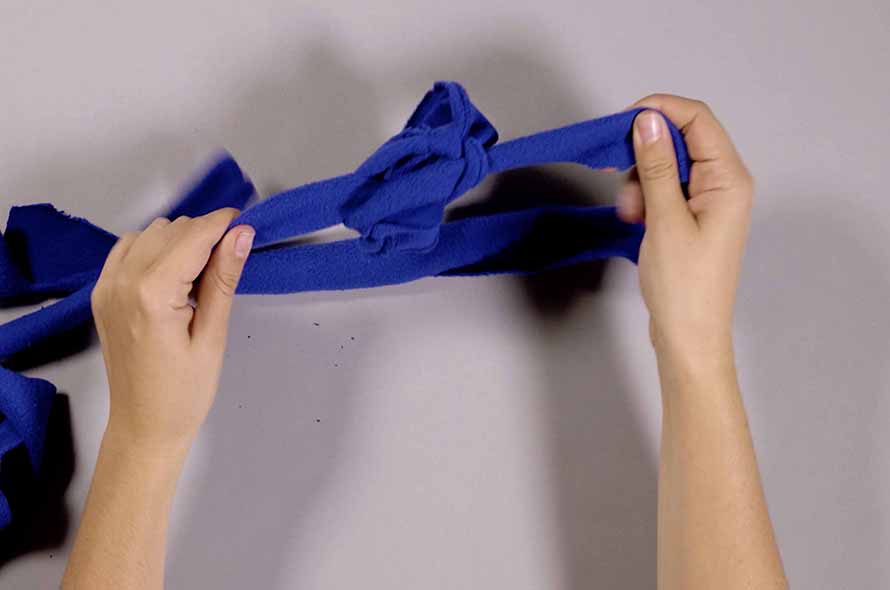
Tie the long strip onto the cuff, at the middle of the strip, making sure you have an even amount of material on each side of the knot.
STEP 4
Take your strip on the left hand side and pass it around the front of your cuff and over to the other side to make an 'L' shape. Then take the strip on the opposite side and pass it over your first strip, and around the back of the cuff, passing it through the loop that you have made with the strip on the left (this part is a little tricky, so you way want to check out our video). Pull both strips as tight as you can, trying to cover the material underneath.
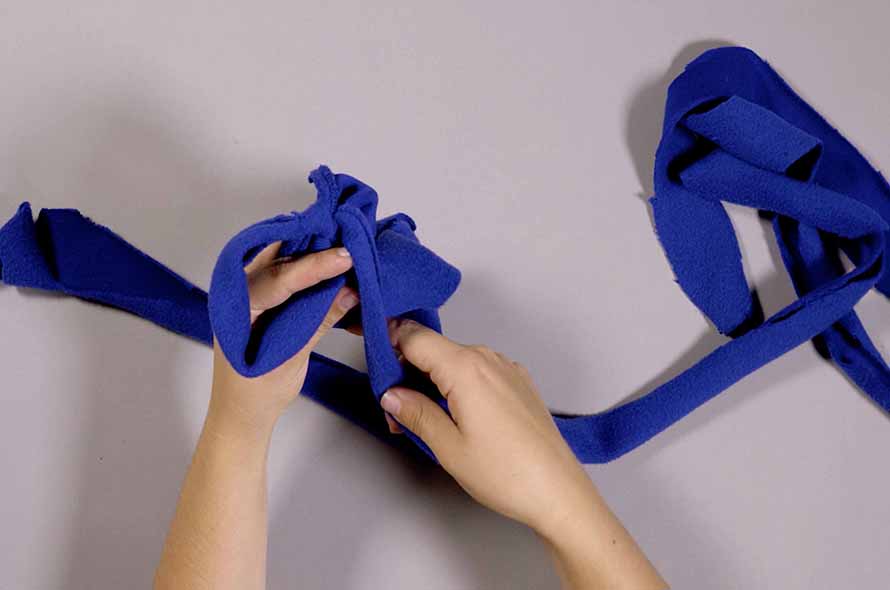
STEP 5
Repeat the last step, but this time start your knot on the opposite side. So this time, you will be making a backwards 'L' shape with the strip on the right hand side.
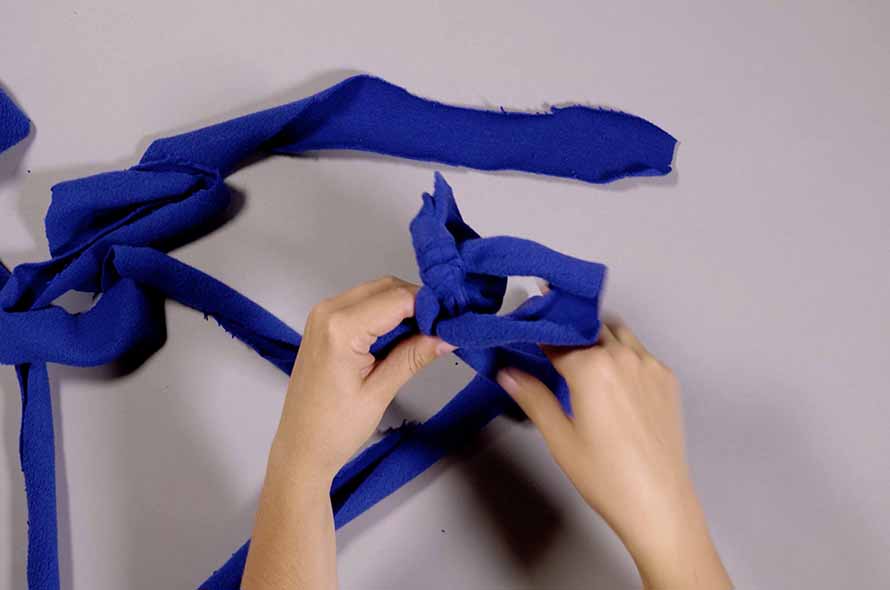
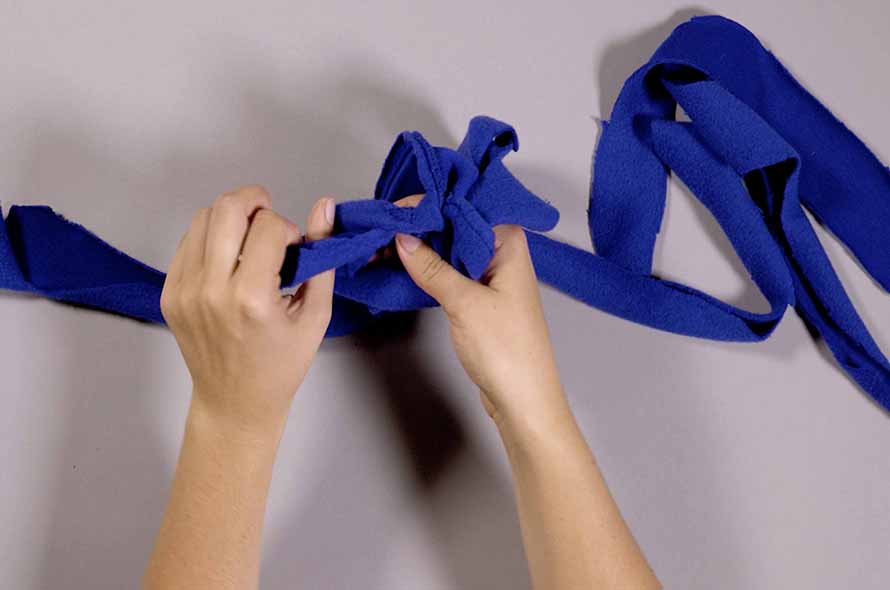
STEP 6
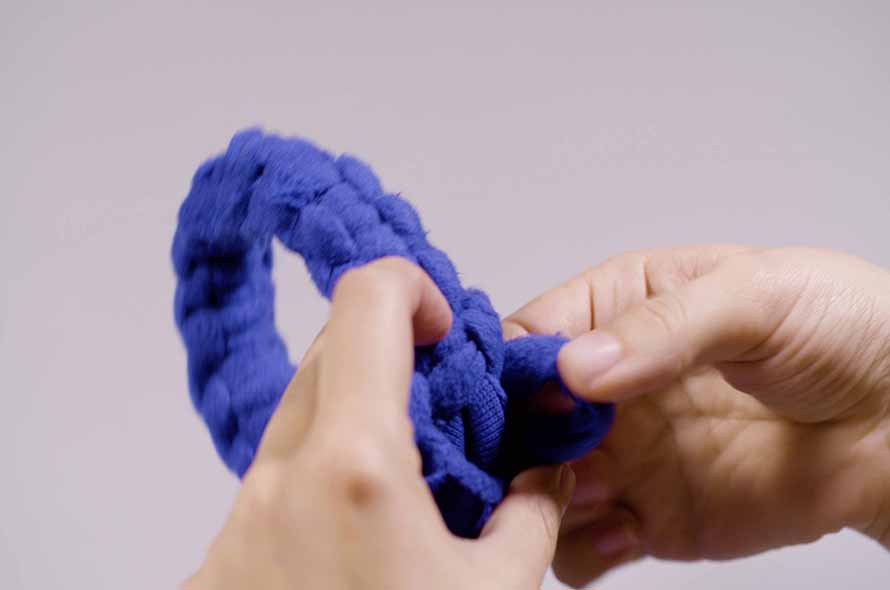
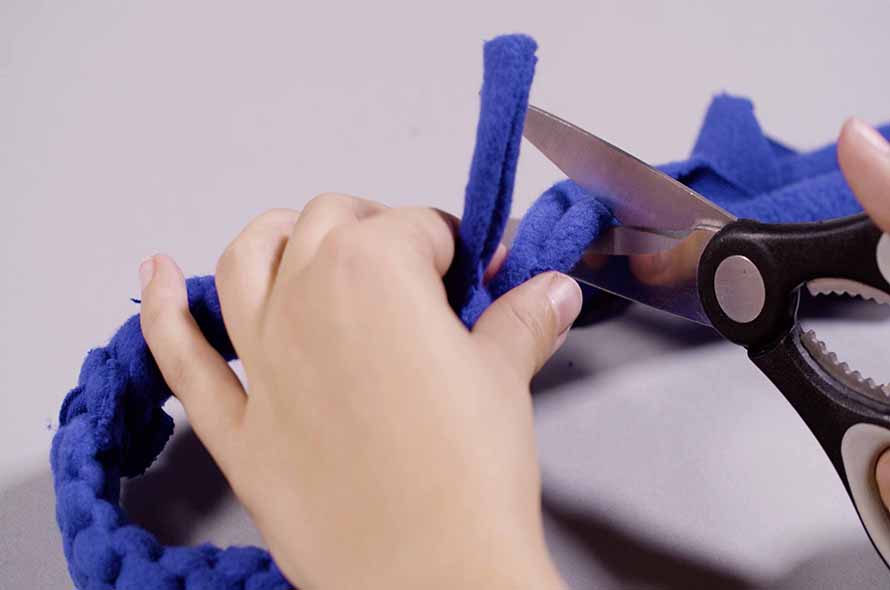
Keep repeating this process, alternating sides each time, until you have gone all the way around the cuff. You may sometimes need to shuffle the knot upwards to overlap with the previous knot and keep the material underneath covered. Tie to finish and then cut off any excess material.
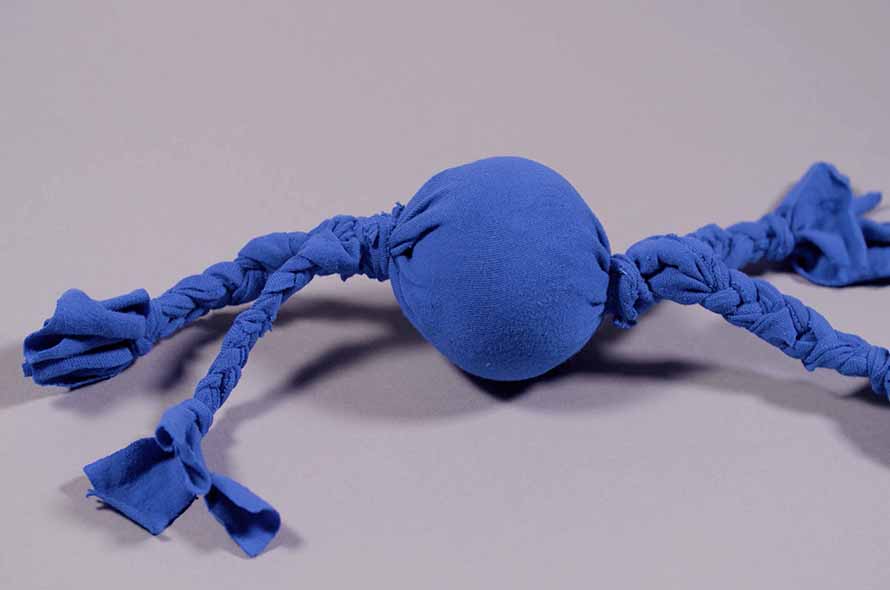
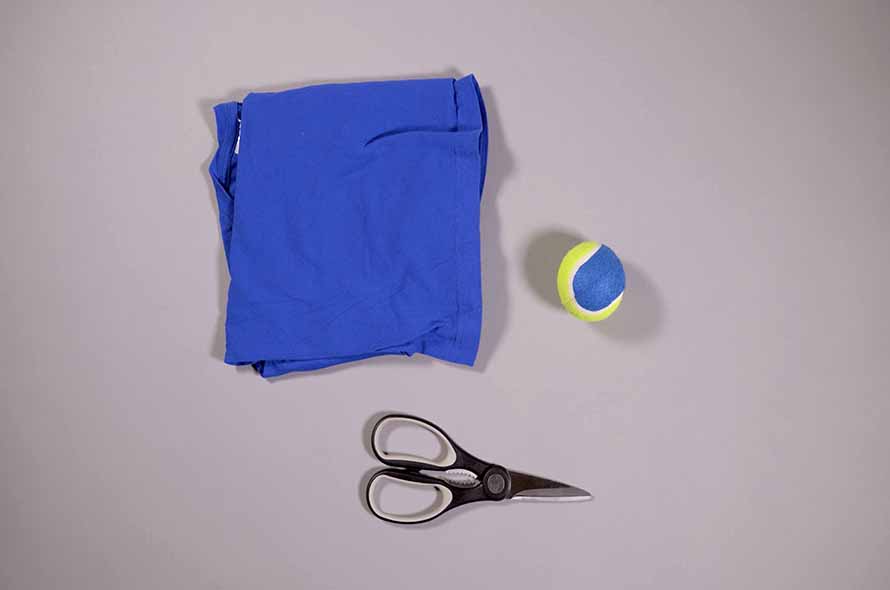
DIY OCTOPUS RAGGER DOG TOY
A homemade ragger toy is a great way to engage your dog in lots of different play behaviours. Perfect for dogs who like to chase or play tug.
The best way to play with your dog with a ragger toy like this is to hold either end in your hands and allow them to grab it in the middle. You can also drag your ragger quickly along the ground to encourage your dog to chase.
As we know, some dogs like to tear up their toys, so make sure you don’t leave them unsupervised with any toys, including homemade dog toys. This will make it less likely that they will ingest any parts that might come off while you’re not looking.
Read the steps
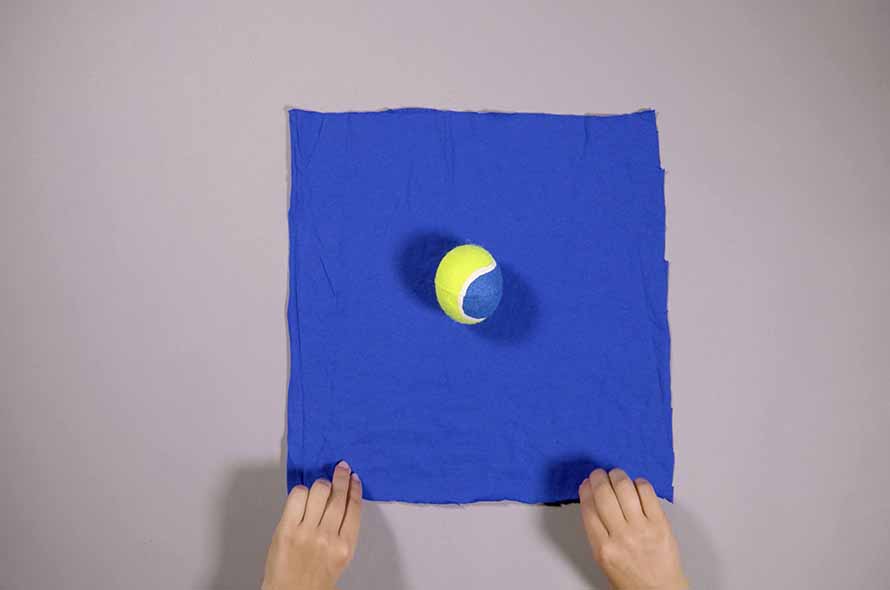
- An old tennis ball
- A pair of scissors
- An old t-shirt or jumper - You’ll want to make sure it’s quite a sturdy material so that your dog can’t rip it up too easily. We recycle old Battersea uniforms.
STEP 1
Start by cutting off the seam along the bottom of your jumper or your t-shirt. Cut this seam into two equal strips and put these to the side for later.
STEP 2
Cut a large rectangle about 25 cm by 35 cm from your T-shirt or jumper. Place your tennis ball in the middle of the edge closest to you and roll it up tightly in the material.
STEP 3
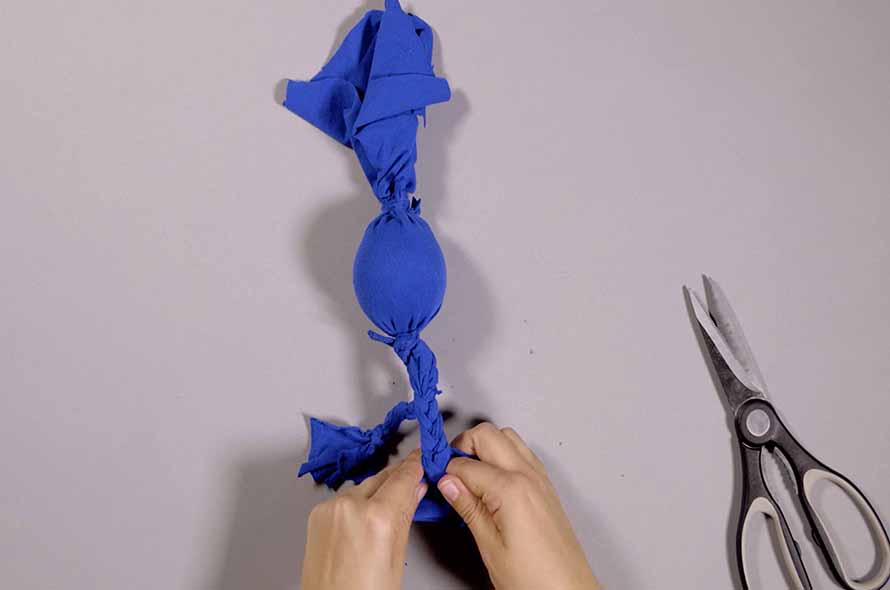
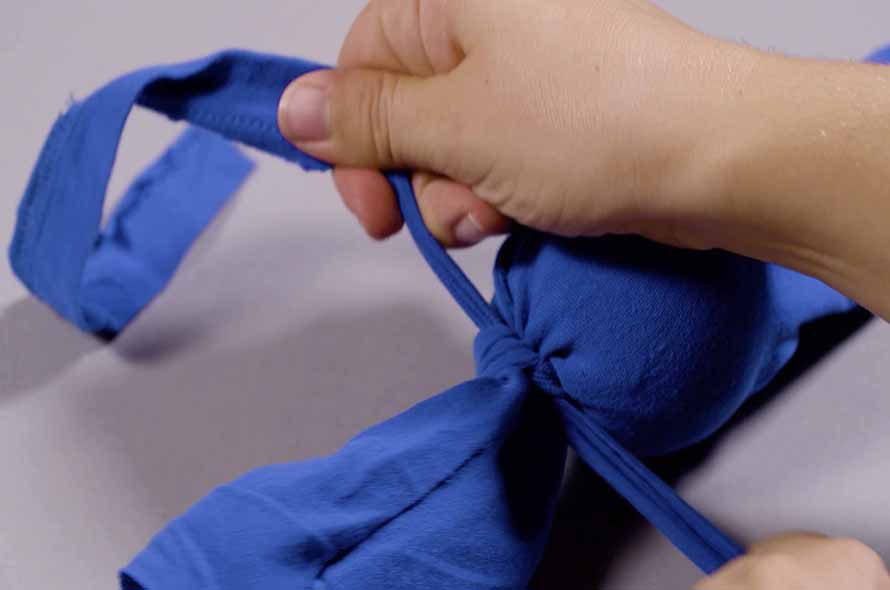
Use one of the strips that you cut earlier to secure the tennis ball into place with a knot. Tie four knots, on alternating sides, until you’re happy the tennis ball is properly secured. Repeat this on the other side, and then cut off any excess strips of material.
STEP 4
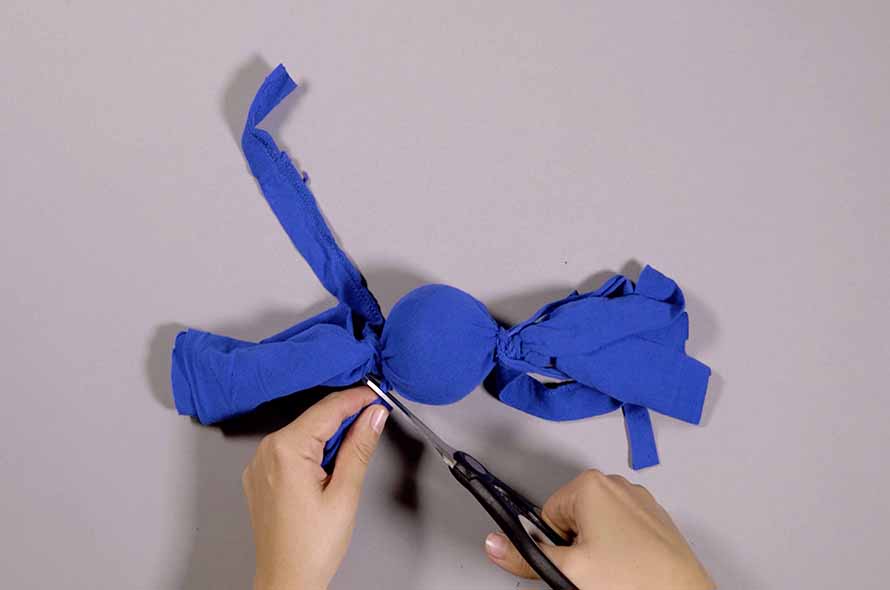
Next, cut the material at either end of the tennis ball into 6 strips. This will allow you to create two plaits at either end.
STEP 5
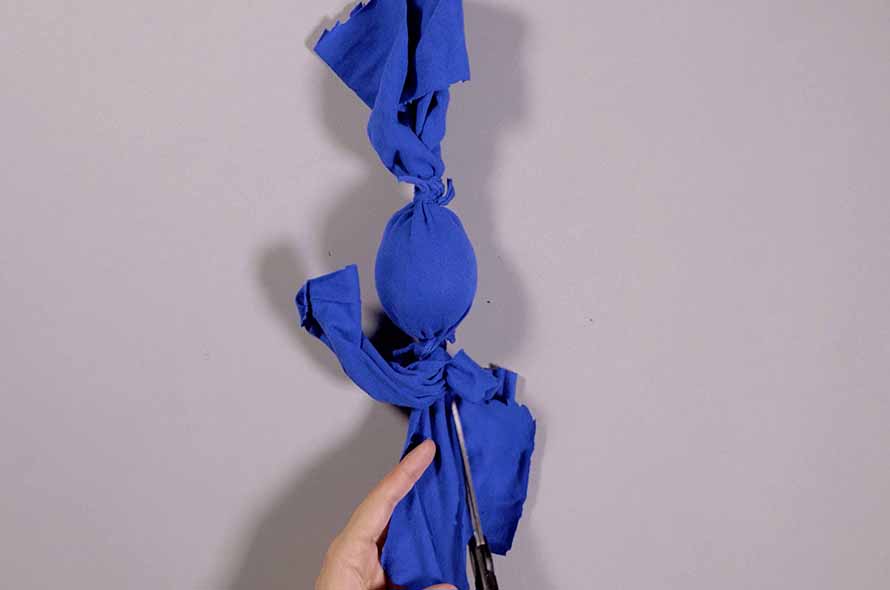
Using three strips at a time, tie your plaits, making sure to leave yourself enough material to tie them up at the end. Repeat this on both ends. Check your toy over for any loose material and then it’s play time!